Modifications #6 & #7 (strong box & cover)

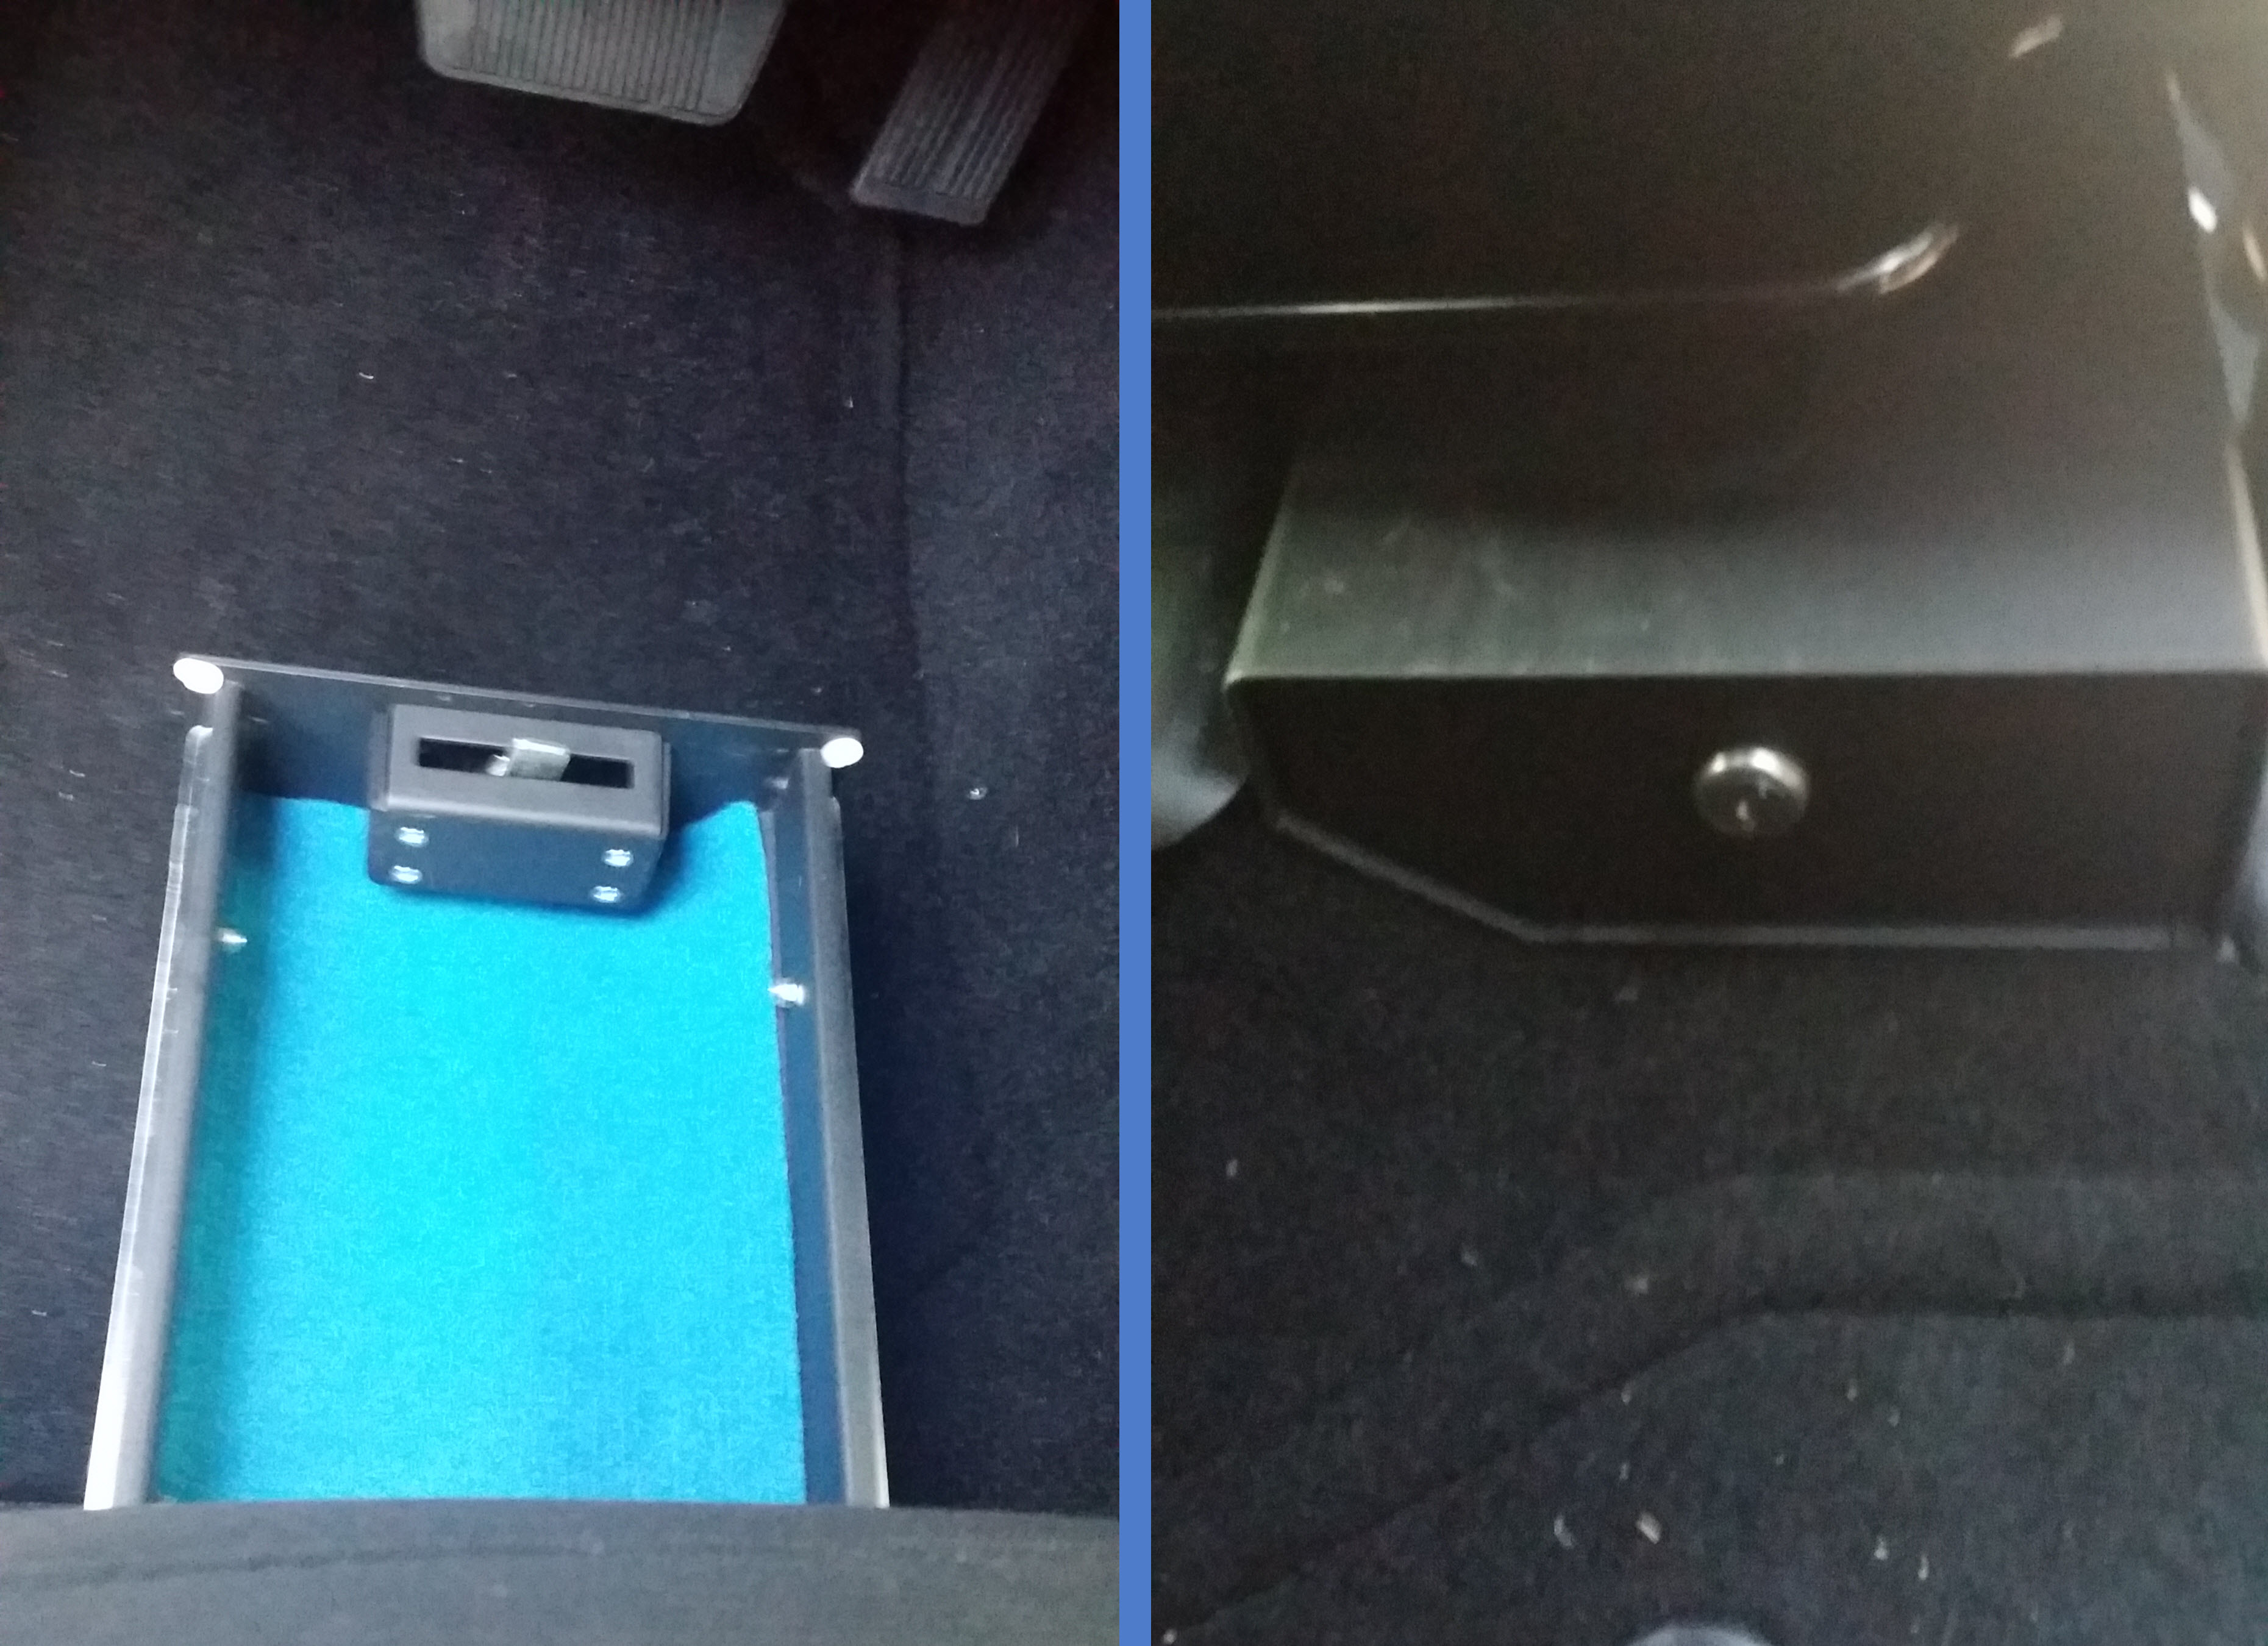
Today I received the strong box in the mail and got it installed. The installation was straight forward and without any issues. I believe I’m going to like it.

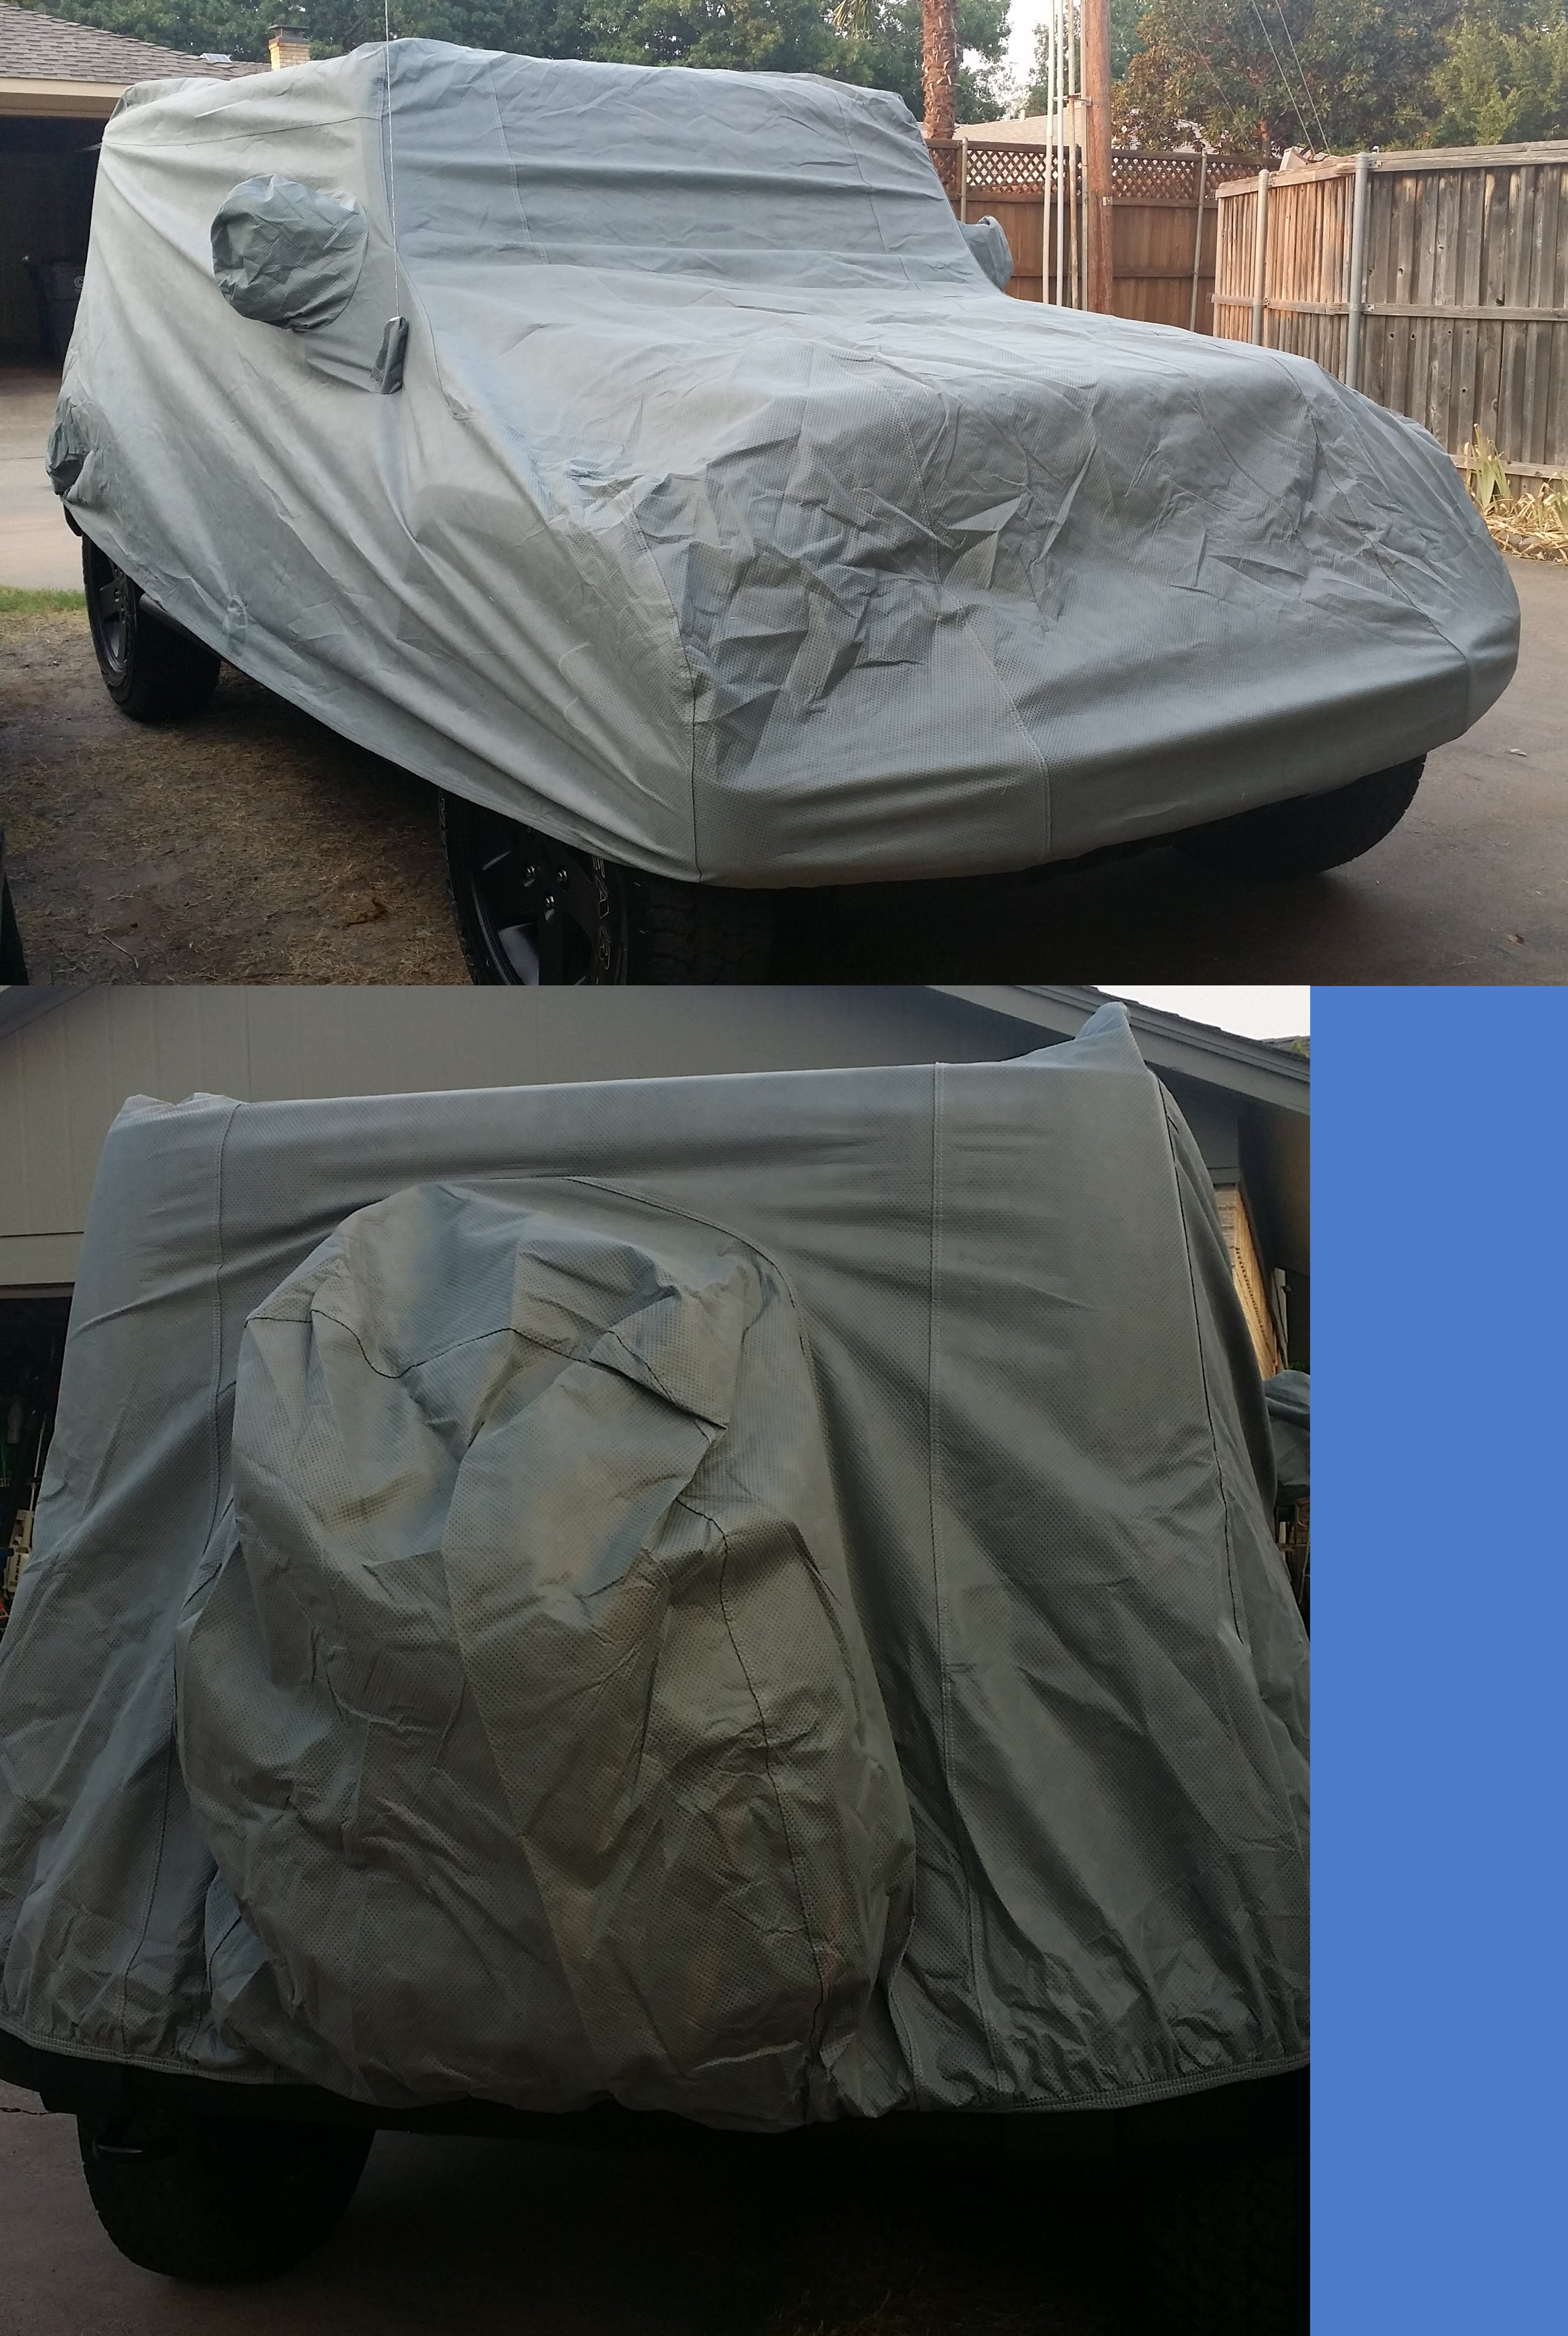
I received the cover the other day, but didn’t give it a trial fitting. Today I got around to it. It’s fine for my purposes. Right now the fore/aft dimensions are a little too tight for it to pull completely over the rear fender, but just barely so. I’m sure it will stretch a bit. It may even stretch and fit by morning. It’s got a nice little indent and hole for the antenna, which also makes it easy to orient when placing it on the Jeep. There’s enough slack that it should accommodate accessories around the body, if they don’t stick out too far.

By-the-way, I did the turn the mirror over mod’ while the dealer was still in the car showing me the different features. He was amazed at the difference in visibility. That evening, when I took my wife for a ride, one of the first things she exclaimed was how great the visibility was through the windshield. She said it was like you were already outdoors. Very soon I’ll do the rear head rest zip tie / spring release mod’ and visibility will be as good a it can get with the doors and top still on.

2015-08-28 Strong Box 002015-08-28 Cover

Modification #3, #4, & #5 (steps, tank, undercoat)

Today I got a few more tasks completed.

  • I installed “Rugged Ridge 11591.08 Textured Black 4.25″ Round Side Tube Steps“.
    • They went on with relative ease. It was easy, but there were a lot of bolts to tighten.
  • I spray painted the muffler matte black.
    • I can’t stand nice looking vehicles that show an ugly silver, stained, and dirty muffler under the bumper.
    • I just used Rustoleum high temperature paint on it (after buffing with steel wool and cleaning).
  • I undercoated the vehicle using Rustoleum spray-on undercoat.

That’s enough for today 🙂

2015-08-27 Step Tubes2015-08-27 Gas Tank

Modification #2 (keys)

I absolutely can’t stand huge keys, so I made the following mod’ to my basic key.

  • Use an blade to make a slice through the rubber key cover, going from the base to the top.
  • Pull off the cover, using the blade to trim away some rubber that will be sticking through perforations on the inside.
  • Use a Dremel cut off wheel to cut away the extra key material on the side opposite the RFID chip.
  • Use the Dremel to cut off the plastic on the side of the RFID chip. Be careful to leave some plastic all around the chip and of course be careful not to damage the chip.
  • Optional: Use some sandpaper to smooth off the trimmed plastic just a little.
  • Dip the key into or spray it with Plasti Dip.
  • Let the Plasti Dip dry.
  • Use an X-acto knife, or similar, to cut out the key ring hole at the top.
  • Done! A crotch/pocket friendly key.

Notes:

  1. This works with the “basic” key only.  This won’t work with one of the key-less entry keys.  However it does work with the “smart key”.  As I mentioned in the steps above, just be careful not to cut into the RFID chip.
  2. My Plasti Dip had thickened too much and I didn’t have any naptha to thin it, so this isn’t the smoothest finish. The nice thing about Plasti Dip is that I can remove it just like I did the original cover and then make a nicer application.

2015-08-26 Key Mod2015-08-26 Key Example

Modification #1 (mirror)

While the dealer was still in the vehicle giving me “the tour”, I turned the rear view mirror upside down.  This vastly improves visibility through the front windshield.

Wabbit Killer

I just picked up my Jeep today. Whoohoo!

Some would call this a “mid-life crisis”, but if that were so then it would be red, two door, and look incredibly like a Miata.  No, this is “delayed gratification”.  I’ve only wanted one since I was 11.  (Possibly earlier, but the first I recall wanting one was when I was 11.)

The old 1999 Pontiac Sunfire has served well, but it’s dying now and it was time for a replacement that would serve Jean and I better for pulling the boat and taking trips where we need a vehicle with more room.  Then I’m blessed with a wife that’s encouraged me to get a vehicle I’ve always wanted and that will make it easier and more fun to pursue my hobbies.

Basics:

  • Year:  2015
  • Model: Wrangler Sport Unlimited
  • Color: Tank Green
  • Roof: Hard Top
  • Wheels: Dealer upgrade to black 17″ wheels
  • Tires: Dealer upgrade to Wrangler All-Terrain 245/75-17

Plans:

Getting a soft top and some tube doors are the only big items planned.  My activities don’t require that I trick it out with all sorts of fancy off-road stuff.  But I will tweak it with a number of smaller and lower-cost modifications.  I’ll post the modifications as I make them.

2015-08-26 Jeep 01  2015-08-26 Jeep 03

2015-03-28 BattleFrog Houston, Race Results

For my Lone Star Spartan friends that participated at the Houston event, here are the race results compiled, from the different divisions, into one Excel workbook.  There are two worksheets.  One for 16k (or more) courses and one for the 8k course.

2015-03-28_BattleFrog_Houston,_Race_Results

Quick and Easy Camp Stove

Here’s a little montage on my quick and easy camp stove. It’s nothing more than a Weber RapidFire Chimney (charcoal starter) and 1/2 of a CanCooker rack, but it works great. Best of all it required no assembly or fabrication, just the purchase of two off-the-shelf products. I went camping/hunting this last weekend after a big rain. All the wood was quite damp, but with some dry kindling and one match I boiled water in less than 7 minutes from the time I lit the match; a total of ten minutes if you count the time I used to gather the wood and kindling. I used the ‘stove’ for every meal, even to grilling a steak and cooking a sweet potato on the rack.

There are a ‘zillion’ DIY plans on the Internet and off-the-shelf camp stoves available. Most all of them are superior to this method. But this one works great and takes zero effort.

Deer Porn

Here is a montage captured by my friend Bill’s trail cam’.  It’s great!

Deer Porn YouTube Link

Awesome Hog and Predator Light

Out this last weekend with the SOGNET group for some deer hunting. The we headed out at night for some hog hunting. I broke out my XLR 250 Kill Light® and the group was impressed. It gives you complete target vision at distances at or exceeding 250+ yards with eye shine visible up to 500 yards. It is awesome, rugged, and the battery life is amazing. (I’m guessing maybe 2 hours of high intensity illumination per rechargeable battery.) If you are looking for a high quality light then you should certainly check out the products by Elusive Wildlife Technologies. I’ve had mine two or three years now and from personal experience I can testify the light is everything it is advertized.  They have other, “better”, models, but I can’t imagine needing more than this light produces.
Kill Light XLR 250
Get it here.

Do-It-Yourself Electronic Predator Caller

I wanted an electronic caller, but it wasn’t (and isn’t) in the budget. But a little foray into the garage yielded the parts needed to put my own together.  If you had to go out and buy all the parts, it would probably run about $80.  It’s not wireless, yet, but it works and works well.  At the bottom of this post are links to the document in PDF and Word format.

01_Caller_Finished-Closed01_Caller_Finished-Open-03

Link to document saved as a PDF file.   (2.5mb)

Link to document saved as a Word docx file.  (11mb)